![Install phpMyAdmin on Rocky Linux 9 [Step-by-Step]](/install-phpmyadmin-rocky-linux-9/install_phpmyadmin.jpg)
phpMyAdmin is an open source database management tool. You can manage MySQL and MariaDB databases via the web browser. In this article, we will explain the topic "How to install phpMyAdmin on Rocky Linux 9".
Install phpMyAdmin on Rocky Linux 9
If you do not have a database (MariaDB, MySQL) installed before, you can get help using Install MariaDB on Rocky LinuxWe will explain the installation in 2 ways. Each method has added benefits to the phpMyAdmin installation. The first method provides ease of installation, while the second method provides an up-to-date use of phpMyAdmin.
Method -1- Installation from EPEL repository
Step-1: Install EPEL Repo
In Redhat based systems (Rocky Linux, Centos, AlmaLinux) the
phpMyAdmin package is in the EPEL repo. Let's
add the epel repository system:
[root@rocky9 foc]# dnf -y install epel-releaseStep-2: Install phpMyAdmin package
Let's install the phpMyAdmin package from the epel repository:
[root@rocky9 foc]# dnf -y install phpmyadminStep-3: Enable Firewalld
Let's enter the firewall rules for http and https:
[root@rocky9 foc]# firewall-cmd --add-service=http --permanent
success
[root@rocky9 foc]# firewall-cmd --add-service=https --permanent
success
[root@rocky9 foc]# firewall-cmd --reload
successStep-4: Enable and Start HTTPD Service
Let's start and enable the httpd service:
[root@rocky9 foc]# systemctl enable httpd --now
Created symlink /etc/systemd/system/multi-user.target.wants/httpd.service → /usr/lib/systemd/system/httpd.service.
Step-5: Configure phpMyAdmin.conf
For remote access we have to make some changes in
/etc/httpd/conf.d/phpMyAdmin.conf file. Let's add the third line by
closing the first 2 lines below. When these lines remain as standard, it
creates a security vulnerability. You can define an alias instead of
pma.
#Alias /phpMyAdmin /usr/share/phpMyAdmin
#Alias /phpmyadmin /usr/share/phpMyAdmin
Alias /pma /usr/share/phpMyAdmin
Add "Require all granted" line under "Require local" line. For
example:
<Directory /usr/share/phpMyAdmin/>
    AddDefaultCharset UTF-8
    Require local
    Require all granted
</Directory>
Finally, the httpd service is restarted:
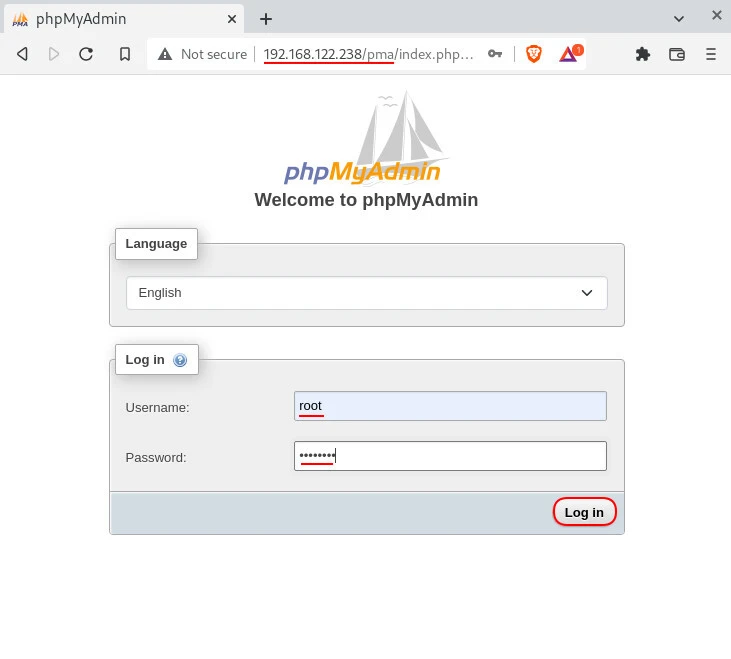
[root@rocky9 foc]# systemctl restart httpdStep-6: Access phpMyAdmin GUI
You can now access phpMyAdmin by typing http://server_ip_adress/pma in
the web browser(In our example: http://192.168.122.238/pma).
Enter the username and password of your MySQL root user to access all the databases.
Method -2- Installation using official archive
Step-1: Install pre-requisite packages
First, let's install the necessary packages:
[root@rocky9 foc]# dnf -y install php php-pdo php-pecl-zip php-json php-mbstring php-mysqlnd httpd wget unzipStep-2: Download phpMyAdmin archive
Then go to Phpmyadmin website with a web browser for the phpMyAdmin version you want to download. Select the version from the list on the screen. Right click and copy the address. Start the download process by typing the link we received after the wget command in the terminal:
[root@rocky9 tmp]# wget https://files.phpmyadmin.net/phpMyAdmin/5.2.0/phpMyAdmin-5.2.0-all-languages.zip
--2022-09-19 23:48:34-- https://files.phpmyadmin.net/phpMyAdmin/5.2.0/phpMyAdmin-5.2.0-all-languages.zip
Resolving files.phpmyadmin.net (files.phpmyadmin.net)... 212.102.56.182, 156.146.33.18, 195.181.174.7, ...
Connecting to files.phpmyadmin.net (files.phpmyadmin.net)|212.102.56.182|:443... connected.
HTTP request sent, awaiting response... 200 OK
Length: 14112668 (13M) [application/zip]
Saving to: ‘phpMyAdmin-5.2.0-all-languages.zip’

phpMyAdmin-5.2.0-all-language 100%[===============================================>] 13.46M 1.86MB/s in 5.8s

2022-09-19 23:48:40 (2.31 MB/s) - ‘phpMyAdmin-5.2.0-all-languages.zip’ saved [14112668/14112668]
Unzip the downloaded zip file:
[root@rocky9 tmp]# unzip phpMyAdmin-5.2.0-all-languages.zipMove the file under /usr/share/:
[root@rocky9 tmp]# mv phpMyAdmin-5.2.0-all-languages /usr/share/phpmyadminStep-3: Enable Remote Access
Create the phpmyadmin.conf file for remote access:
[root@rocky9 tmp]# vi /etc/httpd/conf.d/phpmyadmin.confand write the following lines in this file:
Alias /pmadmin /usr/share/phpmyadmin

<Directory /usr/share/phpmyadmin/>
  AddDefaultCharset UTF-8
  Require all granted
</Directory>
Create tmp directory for phpmyadmin, give necessary permissions to
this tmp directory and phpmyadmin directory:
[root@rocky9 foc]# mkdir /usr/share/phpmyadmin/tmp
[root@rocky9 foc]# chown -R apache:apache /usr/share/phpmyadmin
[root@rocky9 foc]# chmod 777 /usr/share/phpmyadmin/tmp
Step-4: Enable SELinux
Enable SELinux and set permissions:
[root@rocky9 foc]# chcon -Rv --type=httpd_sys_content_t /usr/share/phpmyadmin/*Start the http service:
[root@rocky9 foc]# systemctl start httpd.serviceStep-5: Start HTTPD Service
Enable the http service:
[root@rocky9 foc]# systemctl enable httpd.service
Created symlink /etc/systemd/system/multi-user.target.wants/httpd.service → /usr/lib/systemd/system/httpd.service.
Step-6: Allow Firewalld
Finally, give firewall permissions:
[root@rocky9 foc]# firewall-cmd --add-service=http --permanent
success
[root@rocky9 foc]# firewall-cmd --add-service=https --permanent
success
[root@rocky9 foc]# firewall-cmd --reload
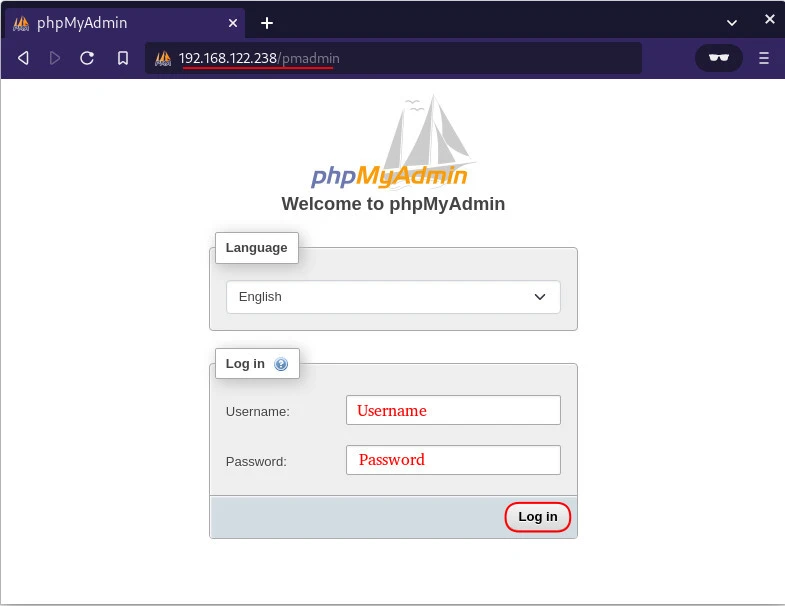
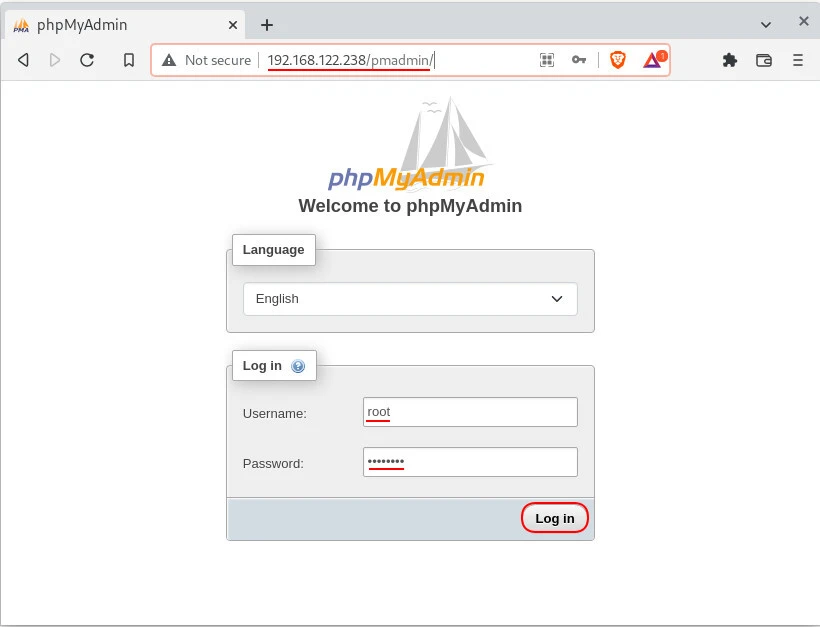
successStep-7: Access phpMyAdmin GUI
You can access phpMyAdmin by typing http://server_ip_address/pmadmin
in the web browser. In our example: we accessed
http://192.168.122.238/pmadmin.
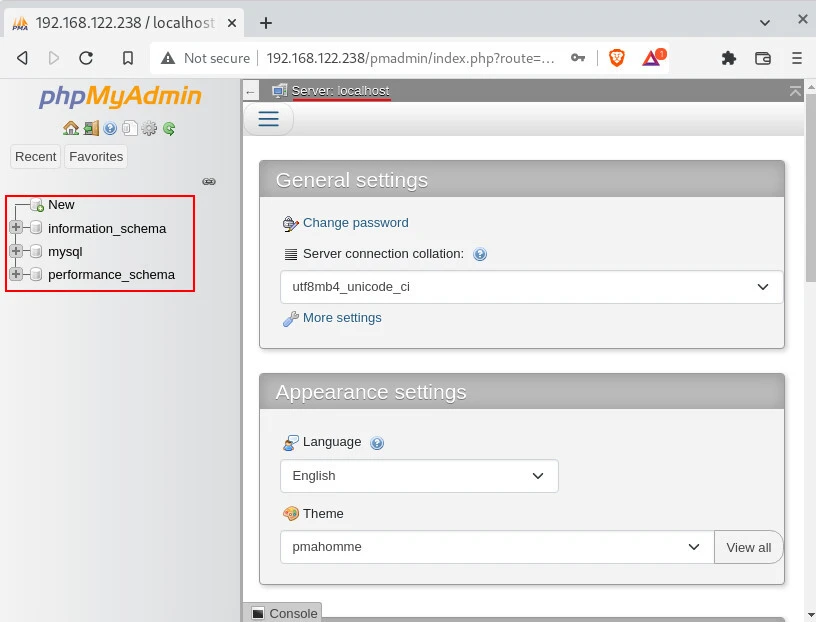
Note that you cannot go further than the above screens when there is no database in the system. If there is a database, you can see it on the left of the screen after login.
Summary
This article explained how to install phpMyadmin on Rocky Linux 9 with 2 methods. You can get help from the "Install MariaDB on Rocky Linux 8.4 Step-by-Step" article for MariaDB database setup.
References
Phpmyadmin.net -
Bringing MySQL to the web
Wiki.crowncloud.net -How to
Install phpMyAdmin on Rocky Linux 8