What is Upstream in Git?
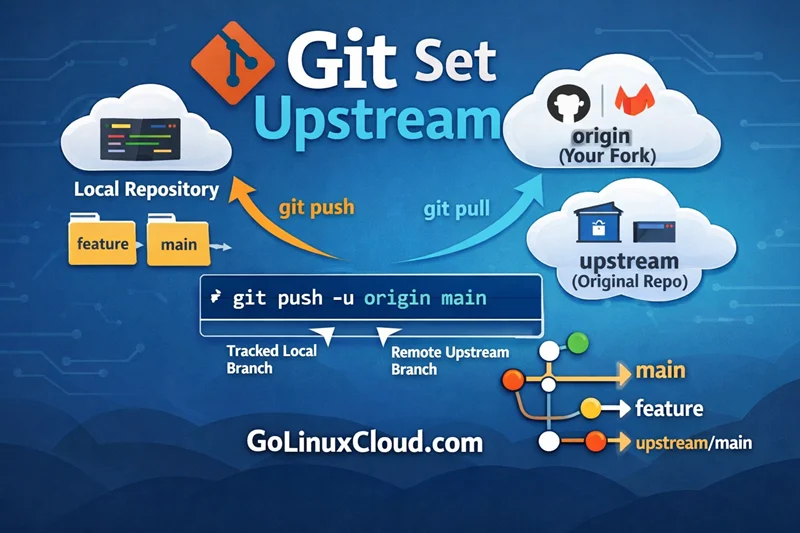
Git upstream refers to the default remote branch that your current local branch tracks. Once configured, you can run simple commands like git push and git pull without specifying the remote or branch name every time.
If you are already using Git, you might have noticed this behavior:
git push origin mainBut after the first push, you can simply run:
git push👉 This works because Git remembers where your branch should push — this is called upstream tracking.
In simple terms:
Upstream = default destination for your branch
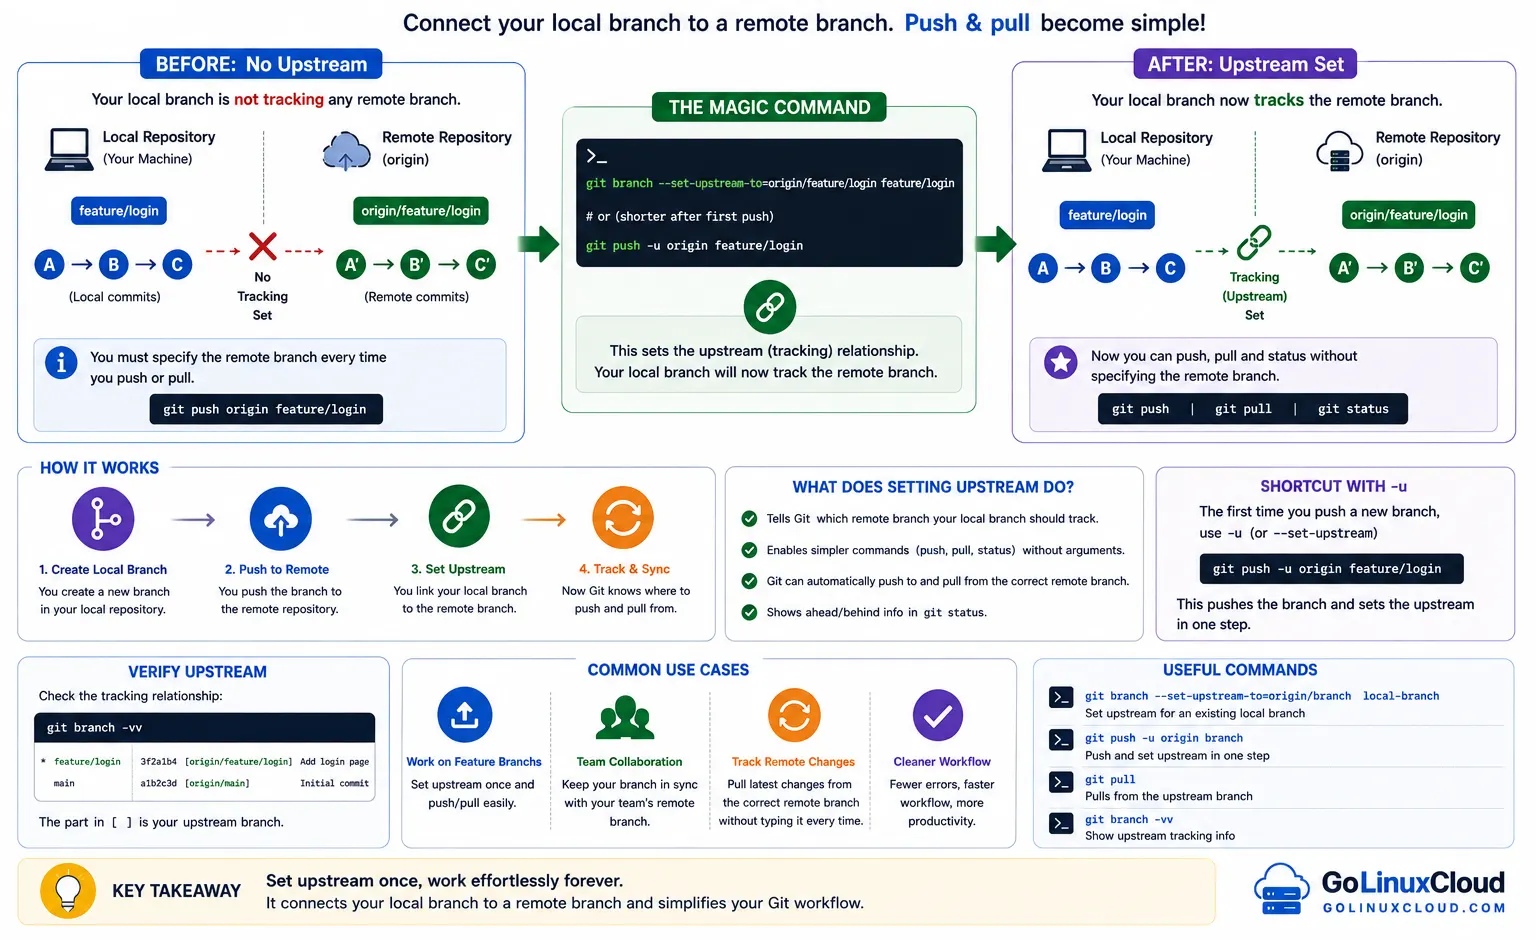
Why Upstream Matters
Without upstream:
- You must always type
originand branch name - Higher chance of mistakes (wrong branch or repo)
- Slower workflow
With upstream:
git pushworks automaticallygit pullworks automatically- Cleaner and faster daily workflow
origin vs upstream (Simple Explanation)
| Term | Meaning |
|---|---|
| origin | Your cloned or forked repository |
| upstream | Original repository (used in fork workflows) |
When you clone a repository:
git clone https://github.com/your-username/project.gitorigin→ your copy of the repoupstream→ original repo (added manually when needed)
👉 You only use upstream when working with forks or syncing changes from the original project.
Git Set Upstream – Quick Cheat Sheet
| Description | Command |
|---|---|
| Push and set upstream for new branch | git push --set-upstream origin <branch> |
| Short form of setting upstream | git push -u origin <branch> |
| Set upstream for existing branch (no push) | git branch --set-upstream-to=origin/<branch> |
| Set upstream while creating new branch | git checkout -b <branch> origin/<branch> |
| Change upstream branch | git branch --set-upstream-to=origin/<new-branch> |
| Remove upstream configuration | git branch --unset-upstream |
| Show upstream branch | git branch -vv |
| Check remote URLs | git remote -v |
| Add new remote (upstream repo) | git remote add upstream <repo-url> |
| Remove remote | git remote rm upstream |
| Change remote URL | git remote set-url origin <new-url> |
| Fetch changes from upstream | git fetch upstream |
| Merge upstream changes | git merge upstream/<branch> |
| Rebase with upstream | git rebase upstream/<branch> |
| Push changes using upstream | git push |
| Pull changes using upstream | git pull |
| Push to specific remote without upstream | git push origin <branch> |
| Fix “no upstream branch” error | git push -u origin <branch> |
| List all branches with upstream info | git branch -vv |
| Set upstream to different remote | git branch --set-upstream-to=upstream/<branch> |
| Create branch tracking upstream | git checkout --track upstream/<branch> |
| Rename branch and keep upstream | git branch -m <new-name> |
| Force push with upstream | git push --force-with-lease |
| Verify upstream config | git status |
Quick Examples
# First push and set upstream
git push -u origin main

# Set upstream for existing branch
git branch --set-upstream-to=origin/main

# Add upstream remote (fork workflow)
git remote add upstream https://github.com/original/repo.git

# Sync fork with upstream
git fetch upstream
git merge upstream/main
Push Code First Time
When you create a new repository using git init tutorial or clone a repo using git clone repository, the first push usually fails due to missing upstream configuration.
Fix: git push rejected / no upstream branch error
This is one of the most common errors when using git push examples. Git requires you to define an upstream branch before pushing.
git push -u origin <branch>Use git push --set-upstream origin
This command sets the upstream and pushes your code in a single step. It is the recommended way when working with new branches created using git branch examples.
git push --set-upstream origin <branch>Verify upstream branch configuration
You can confirm if the upstream is correctly set using:
git branch -vvTo understand branch tracking better, refer to git list branches.
Working with Forked Repositories (GitHub / GitLab)
When contributing to open-source projects on platforms like getting started with GitHub or gitlab tutorial for beginners, you will frequently work with origin and upstream.
Add upstream remote (git remote add upstream)
After cloning your fork, add the original repository as upstream using:
git remote add upstream <repo-url>For more details, check git remote add examples.
Fetch and sync upstream changes
Use git fetch examples to retrieve changes from upstream:
git fetch upstreamThen merge or rebase:
git merge upstream/mainor
git rebase upstream/mainLearn more about differences in git merge vs rebase.
Keep fork updated with upstream repo
To keep your fork in sync, regularly use:
git fetch upstream
git pull upstream main
You can also explore git pull command examples for more workflows.
Set Upstream for Existing Branch
If you already have a local branch but forgot to set upstream, you can link it manually.
Use git branch --set-upstream-to
This command connects your local branch to a remote branch:
git branch --set-upstream-to=origin/<branch>This is useful when working with branches created using git checkout command or git switch command.
Set upstream without pushing
You can configure upstream without pushing any changes:
git branch --set-upstream-to=origin/<branch>Later, you can push using a simple command from git push examples:
git pushLink local branch to remote branch manually
If the remote branch already exists, you can track it using:
git checkout --track origin/<branch>Refer to git checkout remote branch for more details.
To verify tracking:
git statusFor a broader understanding of workflows, check git workflow.
Change or Update Upstream Branch
Sometimes you may need to update or fix an existing upstream configuration due to branch rename or incorrect setup.
Switch upstream to another branch
You can change the upstream branch using:
git branch --set-upstream-to=origin/<new-branch>This is useful when working with renamed branches as explained in git rename branch.
Change upstream remote URL
If the remote repository URL has changed, update it using:
git remote set-url origin <new-url>Refer to git remote set url examples for more details.
Fix wrong upstream configuration
If the upstream is incorrectly set, first remove it:
git branch --unset-upstreamThen reconfigure using the correct remote and branch.
Git Push Without Typing Branch Every Time
One of the main benefits of setting upstream is simplifying push and pull operations.
How upstream simplifies git push
After setting upstream, you can push changes using a simple command:
git pushThis avoids repeatedly specifying origin and branch name, making your workflow faster and cleaner.
Why git push works after setting upstream
Git automatically knows the destination branch because of upstream tracking. This behavior is part of the standard git workflow used in most teams.
Common Errors and Fixes
fatal: no upstream configured for branch
This error occurs when pushing a branch without upstream configured.
git push -u origin <branch>remote origin already exists
This happens when trying to add a remote that already exists.
git remote rm origin
git remote add origin <repo-url>
You can also review existing remotes using:
git remote -vupstream branch not found
This error appears when the specified remote branch does not exist.
Fix it by creating and pushing the branch:
git push -u origin <branch>permission denied when pushing upstream
This typically occurs due to authentication or access issues.
- Ensure correct repository permissions
- Verify SSH or HTTPS credentials
You can also troubleshoot using git config global to check authentication settings.
Advanced Usage
Set upstream for multiple branches
You can configure upstream for different branches individually:
git branch --set-upstream-to=origin/<branch>Repeat this for each branch you want to track.
Automate upstream setup using config
You can enable automatic upstream setup for new branches:
git config --global push.autoSetupRemote trueThis ensures upstream is set automatically on first push.
Use upstream in CI/CD workflows
In CI/CD pipelines, upstream configuration ensures consistent deployment behavior.
- Helps automate
git pushandgit pull - Ensures correct branch tracking in pipelines
For advanced automation workflows, understanding git rebase can help manage clean commit history.
Frequently Asked Questions
1. How do I set upstream in Git?
git push -u origin <branch> which links your local branch to a remote branch for future push and pull operations.2. What is upstream in Git?
3. What is the difference between origin and upstream in Git?
4. How do I fix no upstream branch error?
git push -u origin <branch> to set the upstream branch and resolve the error.5. How do I change upstream branch in Git?
git branch --set-upstream-to=origin/<branch> to point your local branch to a different remote branch.Summary
Git upstream simplifies how you interact with remote repositories by linking your local branch to a default remote branch. Once configured, you can use simple commands like git push and git pull without repeatedly specifying branch names.
In this guide, you learned how to:
- Set upstream while pushing code for the first time
- Configure upstream for existing branches
- Work with upstream in forked repositories (origin vs upstream)
- Fix common upstream-related errors
- Update or change upstream configuration
- Use upstream to simplify daily Git workflows
Using upstream effectively improves productivity, reduces command complexity, and ensures a smoother collaboration workflow across teams and repositories.
Official Documentation
For deeper understanding and advanced configurations, refer to the official Git documentation: