Working with remote branches is a common task when collaborating on Git repositories hosted on platforms like GitHub or GitLab. Before you can modify a remote branch, you usually need to create a local branch that tracks the remote branch.
The git checkout command allows you to fetch, create, and switch to remote branches in different scenarios depending on your workflow. You can also use git switch for a simpler approach.
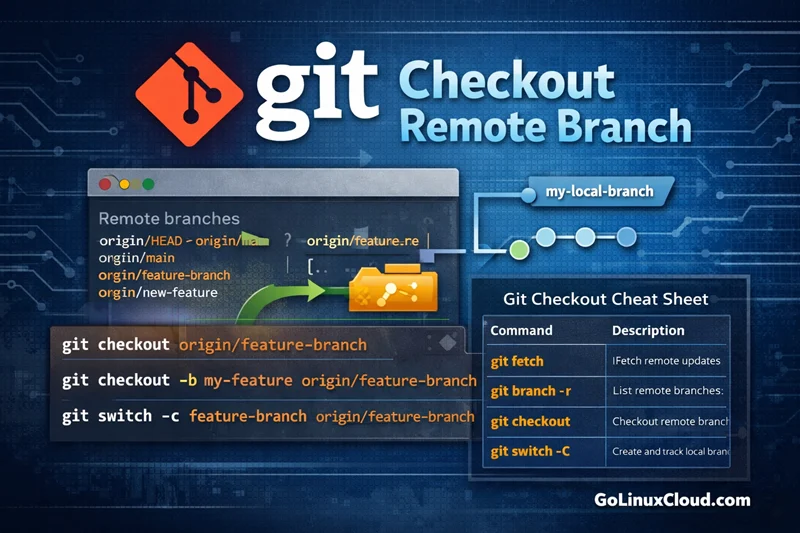
Git Checkout Remote Branch Cheat Sheet
| Command | Description |
|---|---|
git branch -r |
Shows all remote branches available in the repository |
git fetch |
Downloads latest remote branch references |
git checkout origin/feature-branch |
View remote branch in detached HEAD state |
git checkout -b feature-branch origin/feature-branch |
Creates a local branch and links it to remote |
git checkout --track origin/feature-branch |
Automatically creates tracking local branch |
git checkout -b my-feature origin/feature-branch |
Local branch name differs from remote branch |
git switch -c feature-branch origin/feature-branch |
Modern Git command for switching branches |
git branch -vv |
Shows which remote branch the local branch tracks |
git fetch origin && git checkout -b feature origin/feature |
Checkout newly created remote branch |
git branch -a |
Displays both local and remote branches |
Checkout a Remote Branch for the First Time
When collaborating on a shared repository, new branches may be created on the remote server (GitHub, GitLab, Bitbucket). Before working on such branches locally, you must first fetch the remote references and then create a local branch based on the remote branch.
Fetch remote branches
First update your local repository with the latest branch information from the remote repository.
git fetchThis command downloads new commits and branch references from the remote repository without modifying your working directory using git fetch.
You can list all remote branches using:
git branch -rCreate local branch from remote branch
To work on a remote branch, you usually create a local branch that tracks the remote branch using git checkout.
git checkout -b feature-branch origin/feature-branchWhat this command does:
- Creates a local branch named
feature-branch - Links it to
origin/feature-branch - Enables easy git pull and git push.
Switch to the remote branch locally
Once the local branch is created, Git automatically switches to it.
You can confirm the active branch using:
git branchThe branch marked with * indicates the currently active branch.
Checkout Remote Branch with Tracking
Tracking allows your local branch to stay linked with the corresponding remote branch, similar to setting an upstream branch using git set upstream. This makes pulling and pushing changes easier.
Create local branch that tracks origin branch
You can create a tracking branch using the --track option.
git checkout --track origin/feature-branchThis command automatically creates a local branch with the same name as the remote branch and configures upstream tracking.
Verify upstream tracking configuration
To verify that the branch is tracking the remote branch, run:
git branch -vvExample output:
* feature-branch a1b2c3d [origin/feature-branch] Add new login featureThis confirms that the local branch is tracking the remote branch.
Checkout Remote Branch with Different Local Name
Sometimes developers want to use a different name for the local branch while still linking it to the remote branch.
Create local branch with a custom name
You can create a local branch with a different name using:
git checkout -b my-feature origin/feature-branchHere:
my-feature→ local branch nameorigin/feature-branch→ remote branch
Map local branch to remote branch
Git automatically configures the upstream mapping during checkout. You can verify this using:
git branch -vvThis allows your local branch to pull updates from the remote branch seamlessly.
Switch to Remote Branch Using Git Switch
Modern versions of Git introduce the git switch command, which provides a clearer workflow for switching branches.
git switch origin branch
If the remote branch already exists locally, you can switch to another branch using:
git switch feature-branchThis simply moves your working directory to the selected branch.
git switch -c branch origin/branch
To create a new local branch from a remote branch using the modern command:
git switch -c feature-branch origin/feature-branchThis command:
- Creates a new local branch
- Sets it to track the remote branch
- Switches to the new branch immediately
Checkout Remote Branch After Cloning Repository
After cloning a Git repository using git clone, you usually only have one local branch (often main or master). However, the repository may contain several remote branches that other developers are working on.
To work with those branches, you first need to list them and then create a local branch based on the remote branch.
List remote branches
To see the remote branches available in the repository, run:
git branch -rExample output:
origin/HEAD -> origin/main
origin/main
origin/feature-login
origin/feature-api
If you want to see both local and remote branches, use:
git branch -aThis helps identify which branches exist on the remote repository but are not yet available locally.
Checkout feature branch from remote
Once you identify the remote branch you want to work on, create a local branch from it:
git checkout -b feature-login origin/feature-loginThis command:
- Creates a local branch called
feature-login - Links it to
origin/feature-login - Switches your working directory to that branch
You can verify the active branch using:
git branchCommon Errors When Checking Out Remote Branch
pathspec did not match any branch
This error occurs when Git cannot find the specified branch.
Example error message:
error: pathspec 'feature-branch' did not match any file(s) known to gitPossible reasons:
- The branch name is incorrect
- The branch exists on the remote but has not been fetched
- Typographical errors in the command
Solution:
Fetch the latest branch references from the remote repository using git fetch.
git fetch
git branch -r
Then retry the checkout command.
remote branch not showing locally
Sometimes remote branches may not appear in your local repository if you haven't fetched the latest updates.
To update your remote branch references, run:
git fetch --allThen list all remote branches:
git branch -rAfter fetching, you can create a local branch from the remote branch.
branch exists locally but not tracking remote
In some cases, a local branch may exist but may not be linked to the corresponding remote branch.
You can configure the upstream branch using git set upstream:
git branch --set-upstream-to=origin/feature-branchVerify tracking using:
git branch -vvThis ensures that git pull and git push operate against the correct remote branch.
Git Checkout Remote Branch vs Git Switch
Modern versions of Git introduced git switch to simplify branch switching workflows.
Both commands can be used to create and switch branches from remote repositories using git checkout or git switch.
When to use git checkout
git checkout is the traditional Git command used to:
- Switch between branches
- Create new branches
- Restore files
- Checkout commits
Example:
git checkout -b feature-branch origin/feature-branchThis command creates a local branch that tracks the remote branch.
When to use git switch
git switch is a newer Git command focused specifically on switching branches.
Example:
git switch -c feature-branch origin/feature-branchBenefits of git switch:
- Clearer syntax
- Reduced risk of confusion with file restoration
- Designed specifically for branch operations
Many developers now prefer git switch for modern Git workflows.
Frequently Asked Questions
1. How do I checkout a remote branch in Git?
git checkout -b branch-name origin/branch-name. This creates a local branch linked to the remote branch.2. How do I list remote branches in Git?
git branch -r to list remote branches or git branch -a to see both local and remote branches available in the repository.3. What does git checkout origin/branch-name do?
git checkout origin/branch-name allows you to view the remote branch in a detached HEAD state. To work on the branch, create a local branch using git checkout -b branch-name origin/branch-name.4. How do I create a local branch from a remote branch?
git checkout -b new-branch origin/remote-branch. This creates a new local branch that tracks the remote branch and allows you to push or pull changes easily.5. What is the difference between git checkout and git switch for remote branches?
git switch -c branch-name origin/branch-name is a newer and clearer way to create and switch to a branch tracking a remote branch.Summary
Checking out a remote branch allows developers to collaborate efficiently in distributed Git repositories. By fetching remote branches and creating local tracking branches, you can work on features developed by other team members without affecting the main branch.
Understanding commands like git fetch, git checkout, and git switch helps ensure smooth collaboration and efficient version control workflows.