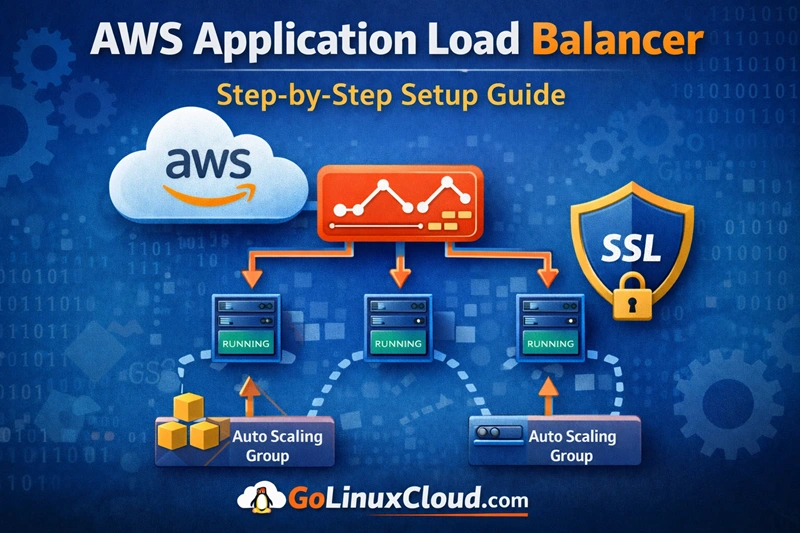
What is AWS Application Load Balancer
AWS Application Load Balancer (ALB) is a Layer 7 load balancer that distributes incoming HTTP and HTTPS traffic across multiple targets such as EC2 instances, containers, IP addresses, or Lambda functions. It intelligently routes requests based on rules such as URL paths, host headers, or query parameters.
Application Load Balancer is commonly used for modern web applications and microservices architectures because it supports advanced routing capabilities and integrates seamlessly with AWS services like Auto Scaling, ECS, and EKS.
Overview of AWS Application Load Balancer
AWS Application Load Balancer is part of the Elastic Load Balancing (ELB) service provided by AWS. It automatically distributes incoming traffic across multiple backend resources to improve application availability and fault tolerance.
ALB operates at the application layer (Layer 7) of the OSI model, meaning it can inspect HTTP/HTTPS requests and make routing decisions based on the request content.
Typical use cases include:
- Hosting scalable web applications
- Distributing traffic across microservices
- Integrating with container-based workloads
- Offloading SSL/TLS encryption
When to use Application Load Balancer
You should use an Application Load Balancer when your application requires content-based routing or advanced request handling.
Common scenarios include:
- Routing traffic based on URL paths
- Routing requests based on domain names (host-based routing)
- Load balancing across microservices
- Handling HTTPS traffic with SSL termination
- Distributing requests to containers in ECS or Kubernetes
If your application requires high-performance TCP or UDP traffic, AWS recommends using Network Load Balancer instead.
Difference between ALB, NLB and Classic Load Balancer
AWS provides multiple types of load balancers designed for different workloads.
| Load Balancer | OSI Layer | Best Use Case |
|---|---|---|
| Application Load Balancer (ALB) | Layer 7 | HTTP/HTTPS applications and microservices |
| Network Load Balancer (NLB) | Layer 4 | High-performance TCP/UDP traffic |
| Classic Load Balancer | Layer 4/7 | Legacy applications |
Key differences:
- ALB supports advanced routing rules.
- NLB provides extremely low latency and high throughput.
- Classic Load Balancer is considered a legacy solution.
Key features of AWS ALB
Application Load Balancer provides several advanced features for modern applications.
Some important features include:
- Path-based routing
- Host-based routing
- Integrated health checks
- SSL/TLS termination
- Integration with Auto Scaling
- WebSocket and HTTP/2 support
- Integration with AWS WAF for security
These features allow ALB to support highly scalable and resilient cloud architectures.
How AWS Application Load Balancer Works
AWS Application Load Balancer acts as an entry point for client requests. It receives incoming traffic and distributes it across multiple targets based on routing rules and health status.
This ensures that applications remain highly available even if some backend instances fail.
Request flow in Application Load Balancer
The typical request flow works as follows:
- A client sends a request to the load balancer DNS endpoint.
- The ALB listener receives the request.
- Listener rules evaluate the request.
- The request is routed to the appropriate target group.
- One healthy target in the group processes the request.
- The response is returned back to the client.
This process ensures efficient traffic distribution and high availability.
Understanding listeners and listener rules
A listener is a process that checks for incoming connection requests using a specific protocol and port.
Example listeners:
- HTTP on port 80
- HTTPS on port 443
Listeners use rules to determine how requests should be routed.
Routing rules can be based on:
- URL path
- Hostname
- HTTP headers
- Query parameters
Example rule:
/api/*  → Target Group A
/images/* → Target Group B
How target groups distribute traffic
A target group contains backend resources that receive traffic from the load balancer.
Targets can include:
- EC2 instances
- IP addresses
- containers
- Lambda functions
When a request arrives, the load balancer selects a healthy target from the target group and forwards the request to it.
Health checks and failover mechanism
AWS Application Load Balancer continuously monitors the health of registered targets.
Health checks verify whether backend instances are responding correctly.
Typical health check parameters include:
- health check path (e.g.,
/health) - response timeout
- check interval
- healthy threshold
- unhealthy threshold
If a target becomes unhealthy, the load balancer automatically stops routing traffic to it until it becomes healthy again.
AWS Load Balancer Architecture
The architecture of AWS Application Load Balancer involves several AWS networking components working together to distribute traffic efficiently.
Components of Application Load Balancer
The main components include:
- Load balancer
- Listeners
- Listener rules
- Target groups
- Targets (EC2 instances or containers)
Each component plays a specific role in traffic routing and application availability.
Understanding VPC, subnets and availability zones
AWS Application Load Balancer must be deployed inside a Virtual Private Cloud (VPC).
To achieve high availability, the load balancer should span multiple Availability Zones.
Each Availability Zone contains at least one subnet where the load balancer can distribute traffic.
This design ensures that applications remain available even if one Availability Zone experiences failures.
Security groups and inbound traffic
Security groups act as virtual firewalls that control incoming and outgoing traffic.
For an Application Load Balancer:
- inbound rules allow HTTP or HTTPS traffic
- outbound rules allow traffic to backend instances
Example inbound rule:
Type: HTTP
Port: 80
Source: 0.0.0.0/0
This allows traffic from the internet to reach the load balancer.
How ALB routes requests to EC2 instances
After receiving a request, the load balancer routes it to a target group associated with the listener rule.
Each target group contains registered EC2 instances.
The ALB selects a healthy instance and forwards the request to it.
This process distributes traffic evenly across all instances, improving application performance and reliability.
Create EC2 Instances for Load Balancer Testing
Before configuring an AWS Application Load Balancer, we need backend servers that will receive traffic. In this tutorial, we will create multiple EC2 instances that will act as targets for our load balancer.
Launch EC2 instances for backend servers
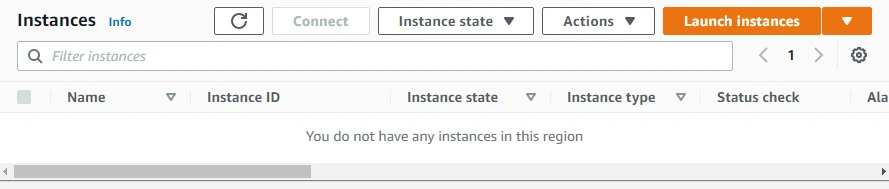
Log in to the AWS Management Console and navigate to EC2 → Instances.
Click Launch Instance and configure the instance.
Select:
- Amazon Linux 2 AMI
- Instance type t2.micro (free tier eligible)
Repeat this process to launch multiple instances, which will later be attached to the load balancer.
Configure user data to install web server
During instance configuration, we can use User Data to automatically install and configure a web server.
Example user data script:
#!/bin/bash
yum update -y
yum install -y httpd
systemctl start httpd
systemctl enable httpd
echo "<h1>Hello from $(hostname -f)</h1>" > /var/www/html/index.html
This script installs the Apache web server and creates a simple webpage.
Configure security group for HTTP traffic
Next, configure a security group that allows inbound HTTP traffic.
Example rule:
Type: HTTP
Port: 80
Source: 0.0.0.0/0
This allows the EC2 instances to receive requests from the load balancer.
Verify EC2 instances are running
Once the instances are launched, verify that they are running correctly.
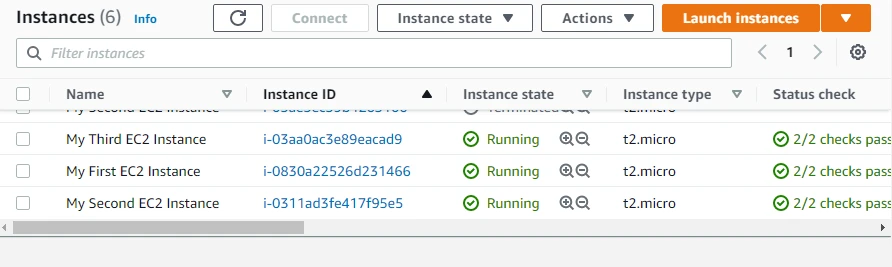
Steps to verify:
- Check the instance state in the EC2 dashboard.
- Copy the public IP address of the instance.
- Open it in a web browser.
If configured correctly, the browser should display the message from the Apache server running on the instance.
Create AWS Application Load Balancer
Now that our EC2 instances are running and ready to serve traffic, the next step is to create an AWS Application Load Balancer (ALB). The load balancer will distribute incoming requests across the EC2 instances to improve scalability, reliability, and availability of the application.
Step 1: Configure basic load balancer settings
Navigate to the AWS Console and open:
EC2 → Load Balancing → Load Balancers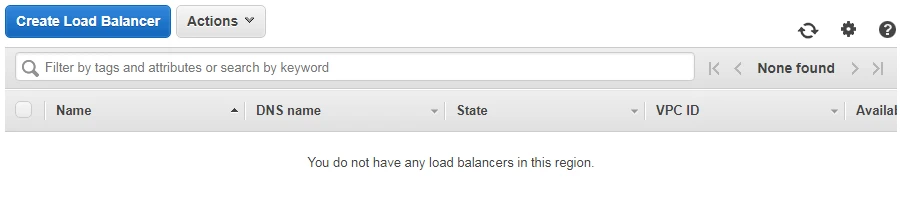
Click Create Load Balancer and select Application Load Balancer.
Provide the following basic configuration:
- Name: My-Test-ALB
- Scheme: Internet-facing
- IP address type: IPv4
- Listener: HTTP on port 80
The scheme determines whether the load balancer is publicly accessible or internal within the VPC.
Step 2: Configure network mapping and availability zones
Next, configure network mapping by selecting the VPC and subnets where the load balancer will operate.
Best practice is to select at least two Availability Zones to ensure high availability.
Example configuration:
- VPC: Default VPC
- Subnets:
- us-east-2a
- us-east-2b
- us-east-2c
This ensures the load balancer can distribute traffic across multiple zones.
Step 3: Configure security groups
Security groups act as a firewall controlling inbound and outbound traffic.
Select an existing security group or create a new one that allows HTTP traffic.
Example inbound rule:
Type: HTTP
Port: 80
Source: 0.0.0.0/0
This allows users from the internet to access the load balancer.
Step 4: Configure listeners and routing rules
A listener checks for incoming connection requests.
Typical listener configuration:
Protocol: HTTP
Port: 80
Listener rules determine how requests are routed to backend targets.
Example rule:
IF path is /api/*
Forward to Target Group A
Step 5: Create and configure target group
The next step is to create a target group, which contains the backend resources that receive traffic.
Configure the following settings:
- Target type: Instances
- Target group name: My-Test-Target-Group
- Protocol: HTTP
- Port: 80
Target groups also perform health checks to monitor the status of backend instances.
Step 6: Register EC2 instances as targets
After creating the target group, you must register the EC2 instances.
Steps:
- Select the running EC2 instances
- Click Include as pending below
- Click Register targets
Once registered, the load balancer will start routing traffic to these instances.
Configure Target Groups in AWS ALB
Target groups are responsible for managing the backend resources that handle requests from the load balancer.
Create a new target group
Navigate to:
EC2 → Load Balancing → Target GroupsClick Create Target Group.
Configure the following:
- Target type: Instances
- Target group name: My-Test-Target-Group
- Protocol: HTTP
- Port: 80
Select the appropriate VPC where the EC2 instances reside.
Register EC2 instances to target group
Once the target group is created, register the EC2 instances.
Steps:
- Select the instances from the available list
- Click Include as pending below
- Click Register targets
These instances will now serve traffic from the load balancer.
Configure health check settings
Health checks ensure that traffic is sent only to healthy targets.
Typical configuration:
Protocol: HTTP
Path: /
Interval: 30 seconds
Timeout: 5 seconds
Healthy threshold: 5
Unhealthy threshold: 2
If an instance fails the health check, the load balancer temporarily stops sending traffic to it.
Verify target group status
After registering the instances, check the Target Health tab.
Each instance should show the status:
HealthyIf the status is unhealthy, verify:
- web server is running
- security group allows HTTP traffic
- health check path is correct
Configure Listener Rules
Listener rules allow the load balancer to route traffic intelligently based on request attributes.
Create HTTP listener
During load balancer configuration, an HTTP listener is created.
Example listener configuration:
Protocol: HTTP
Port: 80
Default action: Forward to target group
This listener receives HTTP traffic and forwards it to the target group.
Configure path based routing
Path-based routing allows different URLs to route to different backend services.
Example rules:
/images/* → Image Server Target Group
/api/* → API Server Target Group
This is commonly used in microservices architectures.
Configure host based routing
Host-based routing routes traffic based on domain names.
Example:
api.example.com → API Target Group
shop.example.com → Ecommerce Target Group
This allows multiple applications to share the same load balancer.
Forward traffic to different target groups
Listener rules determine which target group should receive traffic.
Example rule:
IF path = /api/*
Forward to API Target Group
This improves application organization and scalability.
Test AWS Application Load Balancer
After configuring the load balancer and target groups, the next step is to verify that traffic is distributed correctly.
Verify ALB DNS endpoint
Navigate to the Load Balancer Description page and locate the DNS Name.
Example:
my-test-alb-123456789.us-east-2.elb.amazonaws.comCopy this DNS name.
Send requests to load balancer
Open a web browser and enter the DNS name.
Example:
http://my-test-alb-123456789.us-east-2.elb.amazonaws.comThe request will be routed to one of the EC2 instances.
Confirm traffic distribution across instances
If multiple instances are registered, refreshing the page multiple times should show responses from different instances.
This confirms that the load balancer is distributing traffic properly.
Example output:
Hello from ip-172-31-21-44
Hello from ip-172-31-12-19
Hello from ip-172-31-9-103
Verify load balancing behavior
To further verify load balancing behavior, you can:
- monitor instance logs
- observe request distribution
- use tools like
curlor load testing tools
Example test command:
curl http://my-test-alb-123456789.us-east-2.elb.amazonaws.comIf configured correctly, requests will be balanced across all healthy instances.
Configure HTTPS Listener (SSL)
For production environments, it is recommended to secure your Application Load Balancer with HTTPS. HTTPS encrypts traffic between the client and the load balancer using SSL/TLS certificates.
Create SSL certificate in AWS Certificate Manager
AWS Certificate Manager (ACM) allows you to create and manage SSL certificates easily.
Steps:
- Open AWS Certificate Manager (ACM).
- Click Request a certificate.
- Choose Request a public certificate.
- Enter your domain name (for example:
example.comor*.example.com). - Validate the domain using DNS validation or email validation.
Once validated, the certificate becomes available for use with AWS services like ALB.
Attach certificate to ALB listener
After creating the certificate, attach it to the load balancer.
Steps:
- Open EC2 → Load Balancers.
- Select your Application Load Balancer.
- Go to the Listeners tab.
- Click Add listener.
- Select:
Protocol: HTTPS
Port: 443
Choose the certificate created in ACM and save the configuration.
Enable HTTPS traffic on port 443
The HTTPS listener allows the load balancer to accept encrypted requests from clients.
Example configuration:
Protocol: HTTPS
Port: 443
Default Action: Forward to Target Group
This ensures secure communication between users and the application.
Redirect HTTP traffic to HTTPS
To enforce secure connections, configure an HTTP to HTTPS redirect.
Steps:
- Edit the HTTP (port 80) listener.
- Change the action to:
Redirect to HTTPS
Port: 443
Status code: HTTP_301
This automatically redirects all HTTP requests to HTTPS.
Configure Auto Scaling with ALB
Application Load Balancers integrate seamlessly with Auto Scaling Groups (ASG). This allows the infrastructure to automatically scale based on traffic demand and automatically register new EC2 instances with the load balancer.
If you are new to scaling in AWS, refer to our AWS Auto Scaling tutorial where we explain how to create Auto Scaling groups and configure dynamic scaling policies.
Attach ALB to Auto Scaling group
When creating or editing an Auto Scaling group, you can attach a load balancer.
Steps:
- Navigate to EC2 → Auto Scaling Groups.
- Create or edit an Auto Scaling group.
- Under Load balancing, select:
Attach to existing load balancerChoose the target group associated with the ALB.
Configure dynamic scaling policies
Dynamic scaling adjusts the number of instances automatically based on metrics.
Example scaling policies:
- Scale out when CPU utilization > 70%
- Scale in when CPU utilization < 30%
Scaling policies can be configured using:
- CPU utilization
- request count per target
- network traffic
Verify traffic distribution during scaling
When new instances are launched, they automatically register with the target group.
Steps to verify:
- Open Target Groups → Targets.
- Confirm new instances appear.
- Refresh the ALB DNS endpoint and observe traffic being routed to new instances.
This confirms that scaling is working correctly.
Monitor AWS Application Load Balancer
Monitoring is critical to ensure that your load balancer and backend targets are performing correctly.
AWS provides monitoring capabilities through Amazon CloudWatch.
View ALB metrics in CloudWatch
To view metrics:
- Open CloudWatch.
- Navigate to Metrics → ApplicationELB.
Important metrics include:
- RequestCount
- TargetResponseTime
- HTTPCode_Target_4XX_Count
- HTTPCode_Target_5XX_Count
These metrics help evaluate application performance.
Monitor request count and latency
Request count indicates the number of requests processed by the load balancer.
Latency metrics help determine how long the backend application takes to respond.
Example metrics:
RequestCount
TargetResponseTime
These values help detect performance bottlenecks.
Monitor target health status
The Target Health section in the EC2 console shows whether backend instances are healthy.
Navigate to:
EC2 → Target Groups → TargetsEach instance will show one of the following statuses:
Healthy
Unhealthy
Initial
Draining
Configure CloudWatch alarms
CloudWatch alarms can notify you when thresholds are exceeded.
Example alarm conditions:
- High latency
- High 5XX error rate
- Unhealthy targets
Example alarm configuration:
Metric: HTTPCode_Target_5XX_Count
Threshold: > 10 requests
Period: 5 minutes
Notifications can be sent using Amazon SNS.
Create AWS Application Load Balancer using CloudFormation
Define ALB resources in CloudFormation template
A CloudFormation template describes the resources required to create the load balancer.
Example resource definition:
AWS::ElasticLoadBalancingV2::LoadBalancerThis resource defines the Application Load Balancer.
Create target group in CloudFormation
Target groups can also be defined in the template.
Example:
AWS::ElasticLoadBalancingV2::TargetGroupThe template specifies protocol, port, and health check settings.
Attach EC2 instances to target group
Instances can be registered using the target group configuration.
Example property:
Targets:
  - Id: i-123456789
This connects EC2 instances to the load balancer.
Deploy infrastructure using CloudFormation
Once the template is ready, deploy it through the AWS console.
Steps:
- Open CloudFormation.
- Click Create Stack.
- Upload the template.
- Review parameters and deploy.
CloudFormation will automatically create all resources defined in the template.
Troubleshoot AWS Load Balancer Issues
Targets showing unhealthy status
If targets appear unhealthy, check the following:
- web server is running
- health check path is correct
- security groups allow traffic
Example health check path:
/Load balancer not routing traffic
If traffic is not reaching instances, verify:
- listener configuration
- target group association
- instance registration
Check listener rules in the ALB console.
Security group blocking requests
Security group rules must allow traffic between the load balancer and EC2 instances.
Example rules:
ALB security group → allow HTTP from internet
EC2 security group → allow HTTP from ALB security group
Incorrect rules can prevent communication.
DNS not resolving ALB endpoint
If the ALB DNS name does not resolve:
- verify load balancer state is Active
- check VPC configuration
- ensure internet-facing scheme is enabled
Example ALB DNS name:
my-test-alb-123456789.us-east-1.elb.amazonaws.comOnce active, this endpoint should be reachable from the browser.
AWS ALB vs NLB vs Classic Load Balancer
AWS provides multiple types of load balancers under the Elastic Load Balancing (ELB) service. Each type is designed for specific use cases depending on the protocol, performance requirements, and architecture of your application.
The three main load balancers available in AWS are:
- Application Load Balancer (ALB)
- Network Load Balancer (NLB)
- Classic Load Balancer (CLB)
Understanding their differences helps you select the right load balancer for your workload.
Application Load Balancer vs Network Load Balancer
Application Load Balancer and Network Load Balancer serve different purposes and operate at different layers of the OSI model.
| Feature | Application Load Balancer (ALB) | Network Load Balancer (NLB) |
|---|---|---|
| OSI Layer | Layer 7 (Application Layer) | Layer 4 (Transport Layer) |
| Protocol Support | HTTP, HTTPS, WebSocket, HTTP/2 | TCP, UDP, TLS |
| Routing Type | Content-based routing | Connection-based routing |
| Use Cases | Web applications, microservices | High-performance applications |
| Latency | Moderate | Extremely low |
| Static IP | Not supported | Supported |
| Container Support | Native support for ECS/EKS | Limited |
Use Application Load Balancer when:
- routing based on URL paths
- routing based on hostnames
- handling HTTP/HTTPS traffic
- deploying microservices architecture
Use Network Load Balancer when:
- extremely low latency is required
- handling TCP or UDP traffic
- needing static IP addresses
- supporting millions of requests per second
Application Load Balancer vs Classic Load Balancer
Classic Load Balancer is the previous generation load balancer offered by AWS. It is now considered legacy and AWS recommends using ALB or NLB instead.
| Feature | Application Load Balancer | Classic Load Balancer |
|---|---|---|
| Generation | Modern | Legacy |
| Routing capabilities | Advanced routing rules | Basic routing |
| Microservices support | Yes | Limited |
| Container support | Native | Limited |
| Performance | Higher | Lower |
| Flexibility | High | Low |
Classic Load Balancers are mainly used for older applications that were built before the introduction of ALB and NLB.
When to choose each load balancer type
Choosing the right load balancer depends on the application architecture and traffic type.
Use Application Load Balancer if your application:
- handles HTTP/HTTPS requests
- requires path-based or host-based routing
- uses microservices or containers
- needs integration with modern AWS services
Use Network Load Balancer if your application:
- handles TCP or UDP traffic
- requires ultra-low latency
- processes millions of connections
- requires static IP addresses
Use Classic Load Balancer only if:
- you are maintaining legacy systems
- migrating older infrastructure
For most modern applications, AWS recommends Application Load Balancer.
Frequently Asked Questions
1. What is AWS Application Load Balancer?
2. How do you create an AWS Application Load Balancer?
3. What is the difference between ALB and NLB in AWS?
4. Can AWS Application Load Balancer work with Auto Scaling?
Summary
AWS Application Load Balancer is a powerful Layer 7 load balancing service that distributes HTTP and HTTPS traffic across multiple backend targets such as EC2 instances, containers, and Lambda functions. It provides advanced routing capabilities such as path-based routing, host-based routing, and integrated health checks.
In this tutorial, we explored the architecture of AWS Application Load Balancer, learned how it works, and walked through the complete process of creating an ALB and attaching EC2 instances as backend targets. We also configured listeners, target groups, HTTPS support, Auto Scaling integration, and monitoring through CloudWatch.
With these capabilities, Application Load Balancer becomes a critical component for building scalable, highly available, and fault-tolerant applications in AWS.
Official Documentation
For more details about AWS Application Load Balancer and Elastic Load Balancing services, refer to the official AWS documentation.